When it comes to creating a beautiful and unique landscape, most homeowners think of plants, flowers, and trees. However, there is one element that can add a touch of drama and contrast to your outdoor space – black rocks. These versatile and durable natural stones are perfect for adding depth and texture to any landscaping design. In this article, we will discuss five different ways to incorporate black rocks into your landscaping and provide some helpful tips along the way.
1. Creating a Rock Garden
Rock gardens have been a popular feature in Japanese landscaping for centuries, and it’s no surprise why. They offer a low-maintenance and visually appealing alternative to traditional flower beds. Adding a layer of black rocks to your garden can help create a striking contrast against the greenery and bright flowers, making them stand out even more.
Choosing the Right Black Rocks
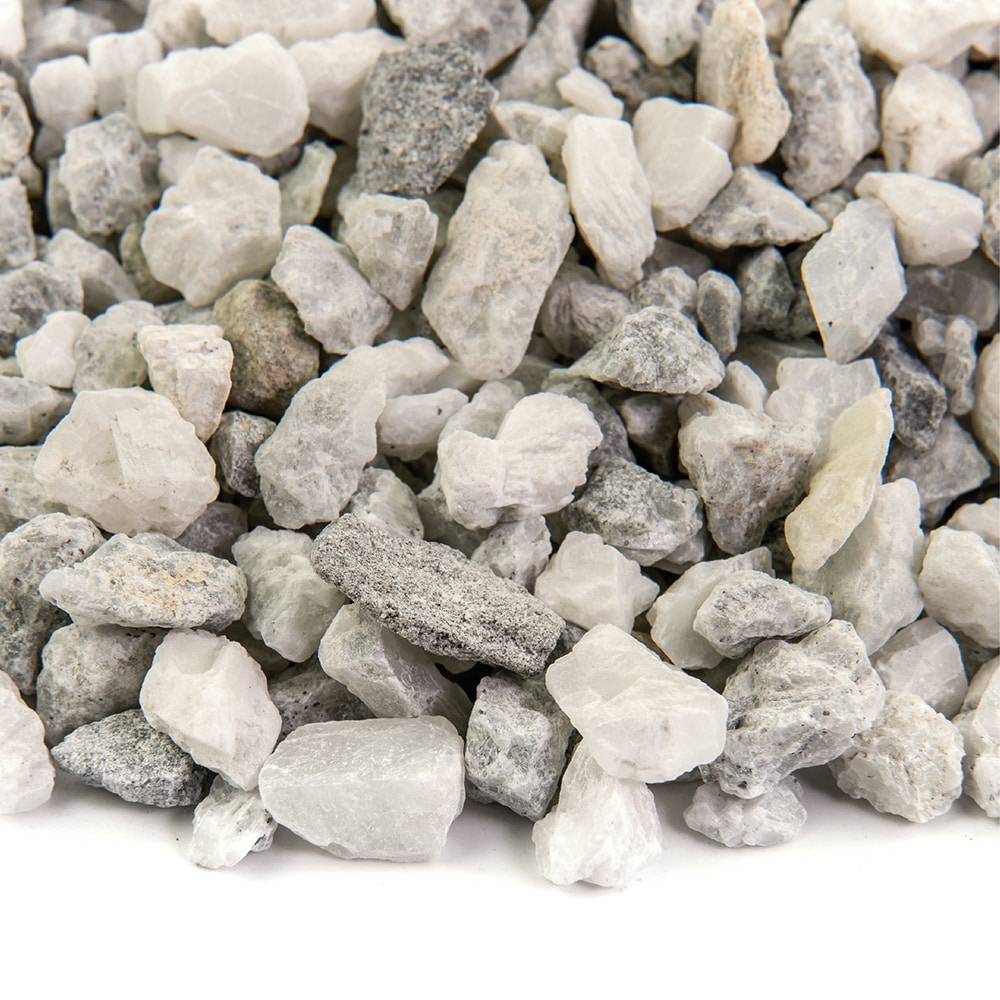
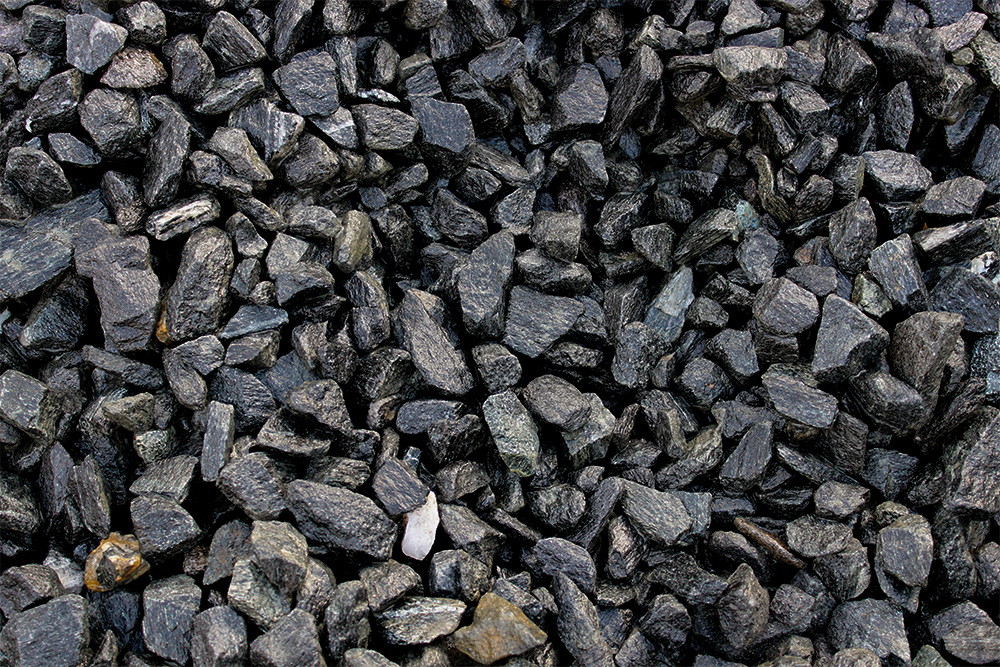
Before you start digging and placing rocks, it’s important to choose the right type of black rocks for your rock garden. There are several options available, including lava rocks, basalt rocks, and black granite. Lava rocks are lightweight and porous, making them a popular choice for drainage and moisture control. Basalt rocks are darker and denser, providing a sleek and modern look. Black granite, on the other hand, has a more polished and refined appearance and is ideal for larger rocks.
How to Create a Rock Garden with Black Rocks
Creating a rock garden with black rocks is relatively easy and straightforward. Here are the steps to follow:
- Prepare the area: Choose a spot in your yard that receives plenty of sunlight and has well-draining soil. Clear the area of any debris, rocks, or weeds before starting.
- Lay down a weed barrier: To prevent weeds from growing through your rocks, lay down a weed barrier fabric before adding the rocks.
- Arrange the rocks: Start by placing the larger rocks first, then fill in the gaps with smaller ones.
- Add plants and mulch: Once your rocks are in place, add some low-maintenance plants such as succulents, cacti, or ornamental grasses. You can also add a layer of mulch to help retain moisture and prevent weeds from growing.
- Maintain regularly: Rock gardens require minimal maintenance, but it’s essential to remove any debris or dead plants to keep it looking tidy.
| Pros | Cons |
|---|---|
| Low-maintenance | May be more expensive than traditional flower beds |
| Provides contrast and texture | Rocks may shift over time and need to be readjusted |
| Durable and long-lasting | Requires initial preparation and planning |
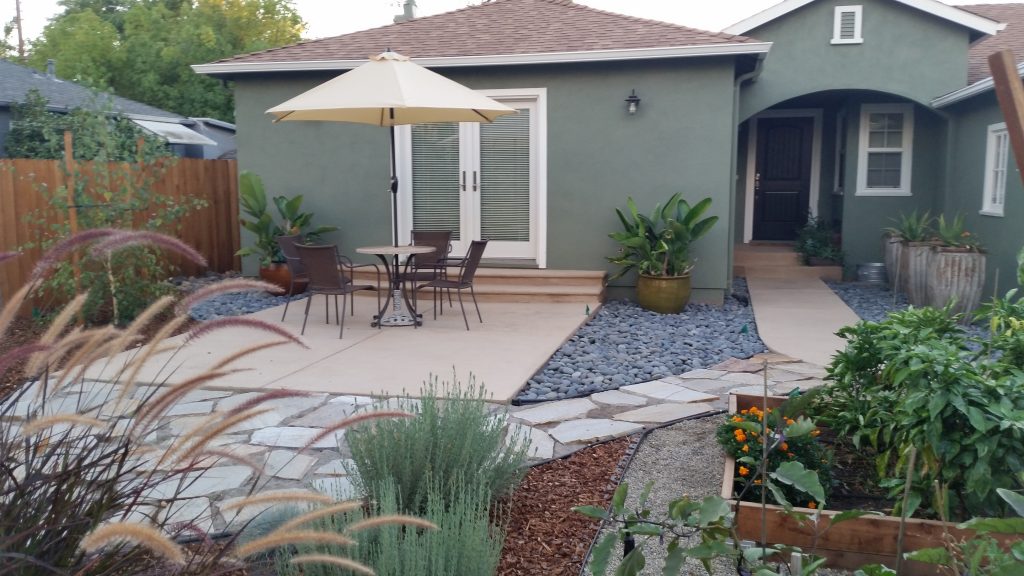
2. Creating a Pathway or Walkway
Adding a pathway or walkway to your yard not only improves the functionality of your outdoor space but also adds visual interest. Black rocks can be used to create a unique and eye-catching pathway that will elevate the overall look of your landscaping.
Choosing the Right Black Rocks
When it comes to creating a pathway, you want to choose black rocks that are durable and comfortable to walk on. Avoid using sharp-edged rocks and opt for smoother, rounder stones instead. Lava rocks and basalt rocks are both suitable options for pathways, but make sure they are large enough not to shift underfoot.
How to Create a Pathway with Black Rocks
Creating a pathway with black rocks is similar to creating a rock garden. Follow these steps to get started:
- Prepare the area: Choose the path’s desired location and clear the area of any plants, debris, or obstacles.
- Lay down a weed barrier: As with the rock garden, lay down a weed barrier fabric before adding the rocks.
- Arrange the rocks: Place the rocks in a straight or curved pattern, depending on the look you want to achieve.
- Fill in the gaps: Once your rocks are in place, fill in the gaps between them with smaller stones or gravel.
- Maintain regularly: Regularly sweep or blow off any debris from the pathway to keep it neat and tidy.
| Pros | Cons |
|---|---|
| Adds visual interest and functionality | Rocks may shift over time and need to be readjusted |
| Durable and long-lasting | Requires initial preparation and planning |
| Can be used in various patterns and designs | May be challenging to walk on for some individuals |
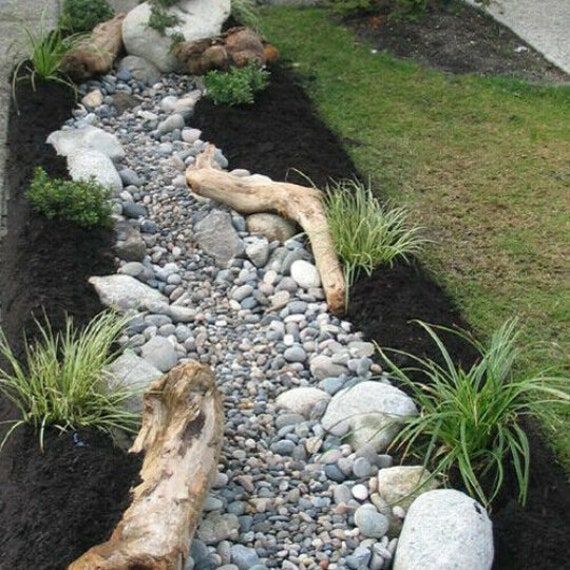
3. Accenting Water Features
If you have a pond, fountain, or any other type of water feature in your landscaping, adding black rocks can help enhance its appearance. Black rocks provide a stunning contrast against the water’s natural blue or green color, creating a striking focal point in your yard.
Choosing the Right Black Rocks
When choosing black rocks for your water feature, consider the size and shape of the rocks. Larger, rounder stones work well as accents around the perimeter, while smaller, flatter rocks can be used to create a waterfall or cascading effect.
How to Accent Water Features with Black Rocks
The steps for accenting water features with black rocks will vary depending on the type of water feature you have. Here are some general steps to follow:
- Prepare the area: Make sure the area around your water feature is clean and free of any debris.
- Choose the placement of rocks: Decide where you want to place the rocks, keeping in mind the size and shape of your water feature.
- Place the rocks: Carefully place the rocks around your water feature, making sure they are securely in place.
- Adjust as needed: Step back and take a look at your water feature. If necessary, adjust the rocks’ placement until you achieve the desired look.
- Maintain regularly: Keep an eye on your water feature and remove any debris or algae that may accumulate on the rocks.
| Pros | Cons |
|---|---|
| Enhances the overall appearance of the water feature | May be more expensive than other accent options |
| Adds texture and contrast | Requires some initial planning and design |
| Low-maintenance | Rocks may shift or become dislodged over time |
4. Creating a Rock Wall or Retaining Wall
Rock walls or retaining walls serve both functional and aesthetic purposes in landscaping. They can help prevent soil erosion, create a level planting area, or add visual interest to your outdoor space. Black rocks are an excellent choice for these types of walls as they provide a dramatic and bold look.
Choosing the Right Black Rocks
When constructing a rock wall or retaining wall, it’s crucial to choose rocks that are strong enough to withstand the pressure of holding back soil. Black granite is an ideal option for retaining walls due to its strength and durability. It’s also important to choose rocks that are relatively flat and fit together without gaps.
How to Create a Rock Wall or Retaining Wall with Black Rocks
Creating a rock wall or retaining wall with black rocks requires some construction skills and planning. Here are the general steps to follow:
- Prepare the area: Make sure the area where you want to build your wall is clear and free of debris.
- Dig a trench: Use a shovel to dig a trench that is deep enough for your first row of rocks to be buried at least one-third of their height.
- Lay down a base layer: Place large rocks in the trench, making sure they are securely in place.
- Build up the wall: Continue adding layers of rocks, staggering them to create a stable structure. Fill any gaps between the rocks with smaller stones or gravel.
- Secure the wall: Use landscape adhesive or concrete mix to secure the rocks in place.
- Maintain regularly: Check your wall periodically for any shifting or damage and make repairs as needed.
| Pros | Cons |
|---|---|
| Provides a unique and striking look | Requires construction skills and planning |
| Can serve both functional and aesthetic purposes | May be more expensive than other wall materials |
| Durable and long-lasting | Regular maintenance is required |
5. Using Black Rocks in Planters and Containers

Finally, black rocks can be used in planters and containers to add a touch of drama and texture to your patio or porch. They can also help with drainage and moisture control, making them an excellent choice for potted plants.
Choosing the Right Black Rocks
As with other applications, it’s essential to choose the right type of black rocks for your planters. Small rocks, such as pea gravel or crushed lava rock, work well for smaller containers, while larger rocks can be used for larger planters. Make sure the rocks are clean and free of debris before adding them to your planters.
How to Use Black Rocks in Planters and Containers
Using black rocks in planters and containers is a simple and effective way to add some interest to your outdoor space. Follow these steps to get started:
- Choose your planter: Decide which planters or containers you want to use and make sure they have proper drainage holes.
- Fill the bottom layer with rocks: Add a layer of rocks to the bottom of the container, covering the drainage holes.
- Add soil: Add potting soil on top of the rocks, leaving enough room for your plants.
- Arrange the rocks: Place the rocks on top of the soil around your plants, making sure they are evenly spread out.
- Water and maintain regularly: Water your plants as usual and make sure the rocks do not cover the plant’s base.
| Pros | Cons |
|---|---|
| Adds a unique touch to your planters | May be more expensive than traditional potting materials |
| Can help with drainage and moisture control | Rocks may shift or settle over time |
| Low-maintenance | Requires initial planning and design |
FAQs
Q: Are black rocks safe for my plants and garden?
A: Yes, black rocks are safe for plants and can actually help with moisture control and prevent weed growth.
Q: Do I need to seal black rocks before using them in my landscaping?
A: No, black rocks do not require any sealing before use. However, you may choose to seal them for a more polished look.
Q: Can I mix different types of black rocks in my landscaping?
A: Absolutely! Mixing different types of black rocks can add more dimension and interest to your landscaping design.
Q: How often do I need to replace the black rocks in my landscaping?
A: With proper maintenance, black rocks can last for many years. However, if they become dislodged or damaged, they may need to be replaced.
Q: Are there any alternative uses for black rocks in landscaping?
A: Yes, black rocks can also be used for fire pits, edging around flower beds, or as a decorative element in outdoor sculptures.
Conclusion
Incorporating black rocks into your landscaping can add a touch of drama and contrast that will elevate the overall look and feel of your outdoor space. From creating rock gardens to accenting water features, the possibilities are endless. Just remember to choose the right type of black rocks for each application, plan and prepare accordingly, and maintain regularly for long-lasting results. With these tips and ideas, you can transform your yard into a stunning oasis with the addition of black rocks.

